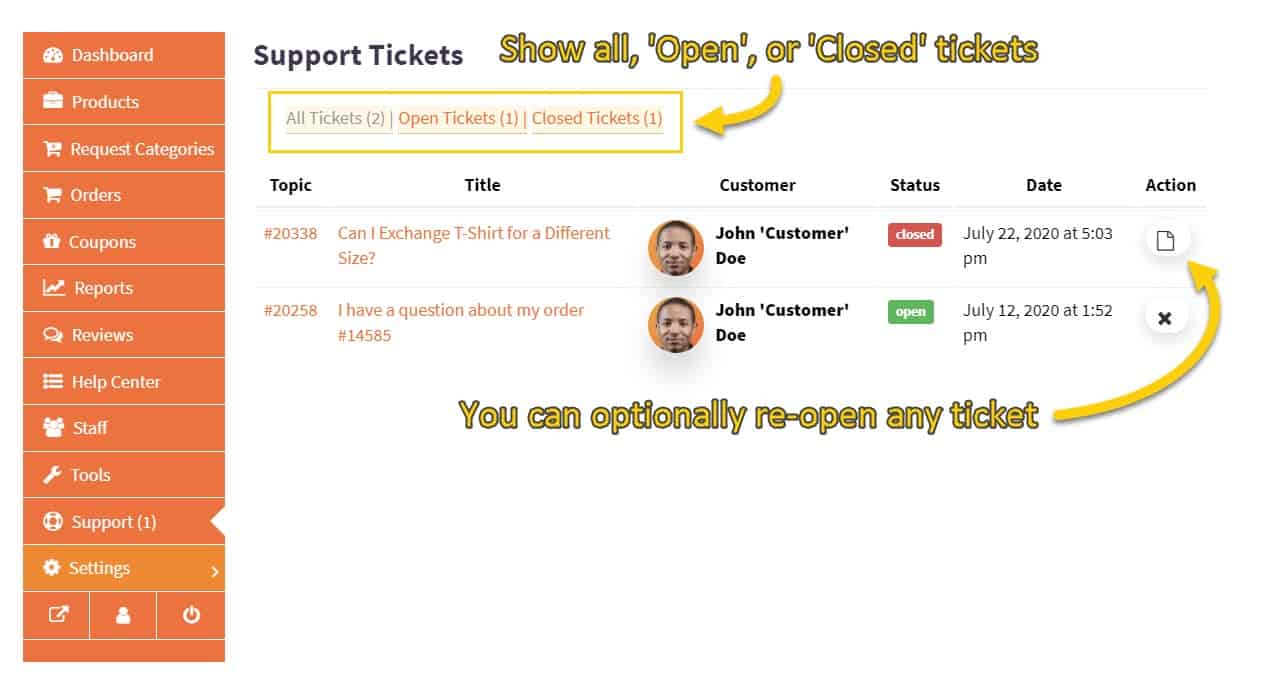
Having an organized and efficient way of dealing with customer queries and support requests is important.
As part of your vendor dashboard, you have access to a support ticket area (Dashboard → Support) where submitted messages from customers will be archived.
You can then address and close each ticket one by one as they’re received.
How Customers Will Submit Support Tickets
First, let’s look at how customers submit support tickets to you, while logged into their account.
All the customer needs to do, is go to your vendor store page and click your support button—if you have it enabled via the store settings page (Dashboard → Settings → Store):
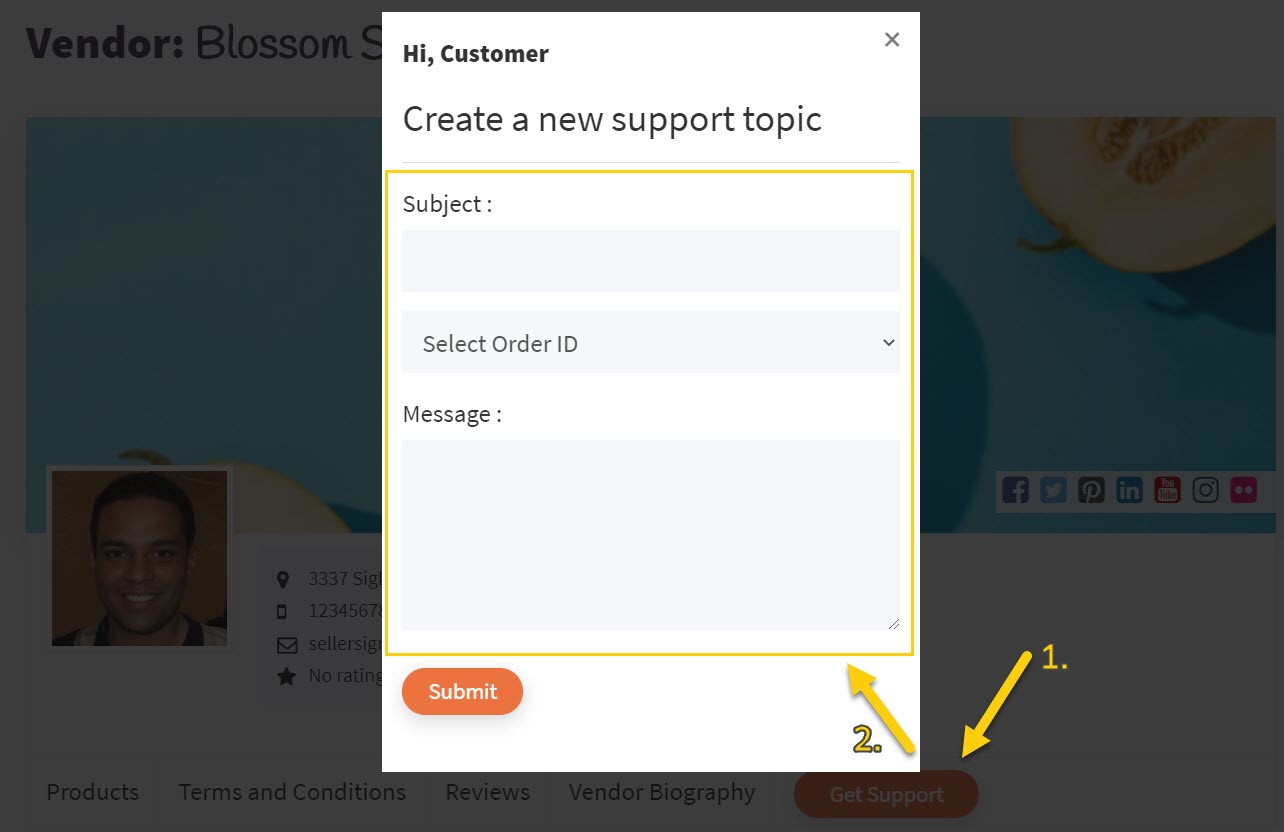
As shown above, that’ll bring up a contact submission form which the customer fills out.
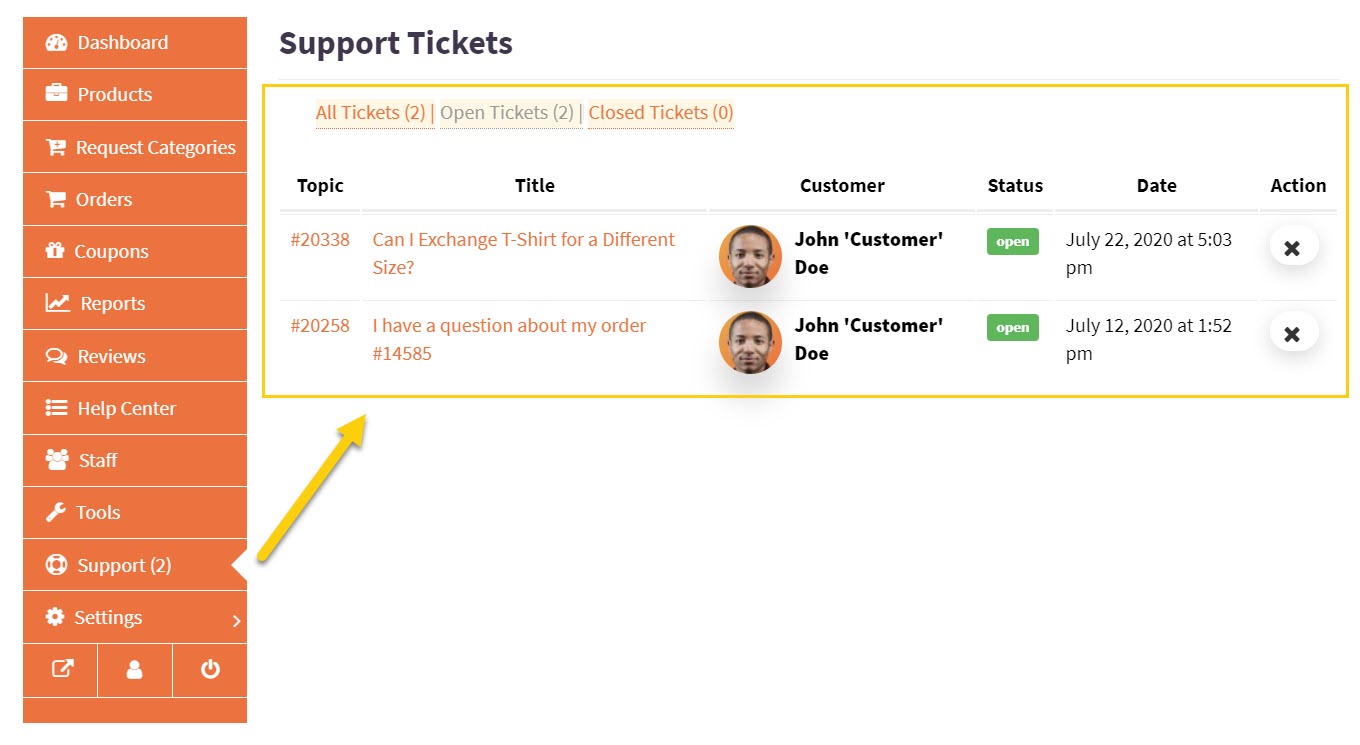
The customer will also select the relevant order of which their submission concerns, and the submission will land in your dashboard support ticket area:
Responding to and Managing Support Tickets
With each ticket submission, you’ll receive an email notification.
You can either click the link in the email to open the ticket page or go to the support ticket area and find the ticket there.
Here’s an example of a ticket thread:
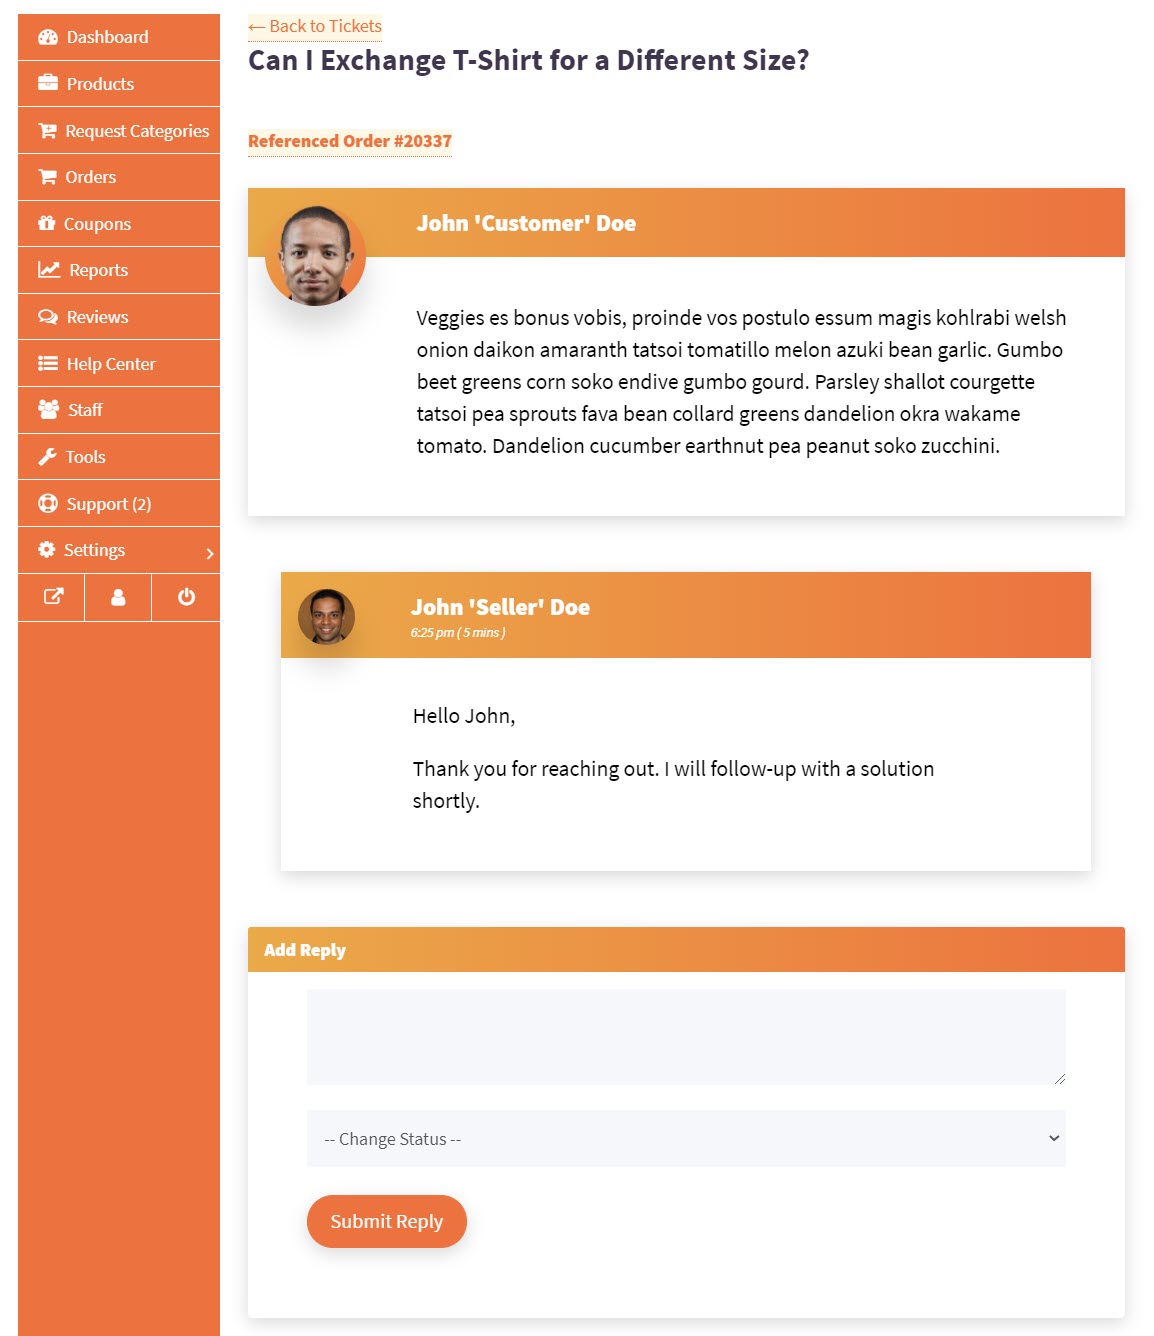
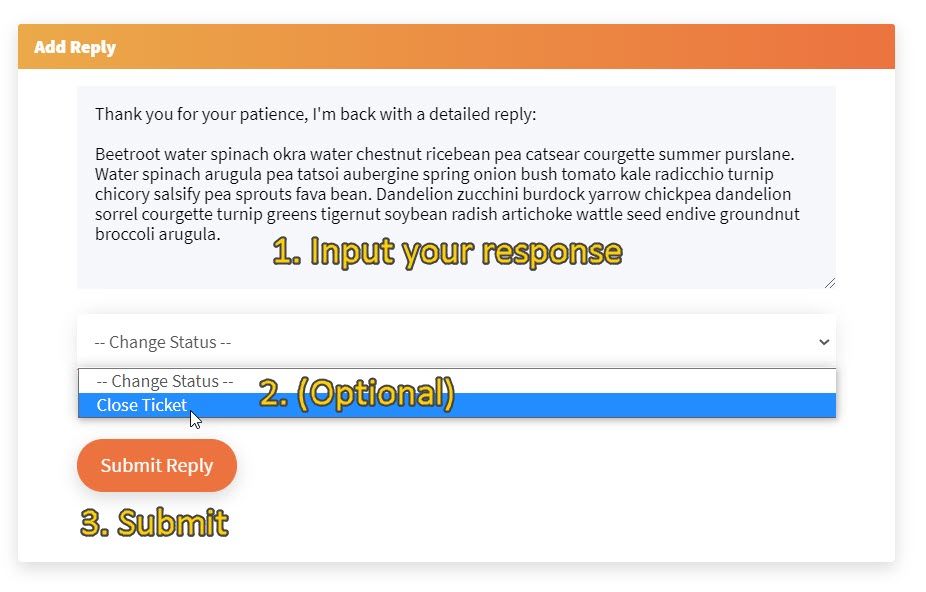
Simply input your reply, optionally change the status to closed and then click Submit Reply:
The customer will receive an email notification of your response.
Closing a ticket means the customer will no longer be able to respond to it and will thus have to open a separate ticket if they feel the matter is unresolved.
You can also choose to re-open a ticket at any time.
