Sometimes you may need the ability to set up products with different variations when a single option isn’t sufficient.
Common scenarios where variable options are needed include but are certainly not limited to:
- clothing that is sold in different sizes and colors;
- food and beverage products made available at different volumes and weights; and
- home goods crafted with different material options.
In the products section via your dashboard, you can easily set up variations of any product.
How to Create Product Variations
Step 1: Navigate to the product’s page (Dashboard → Products) and edit the product you would like to create variations for:
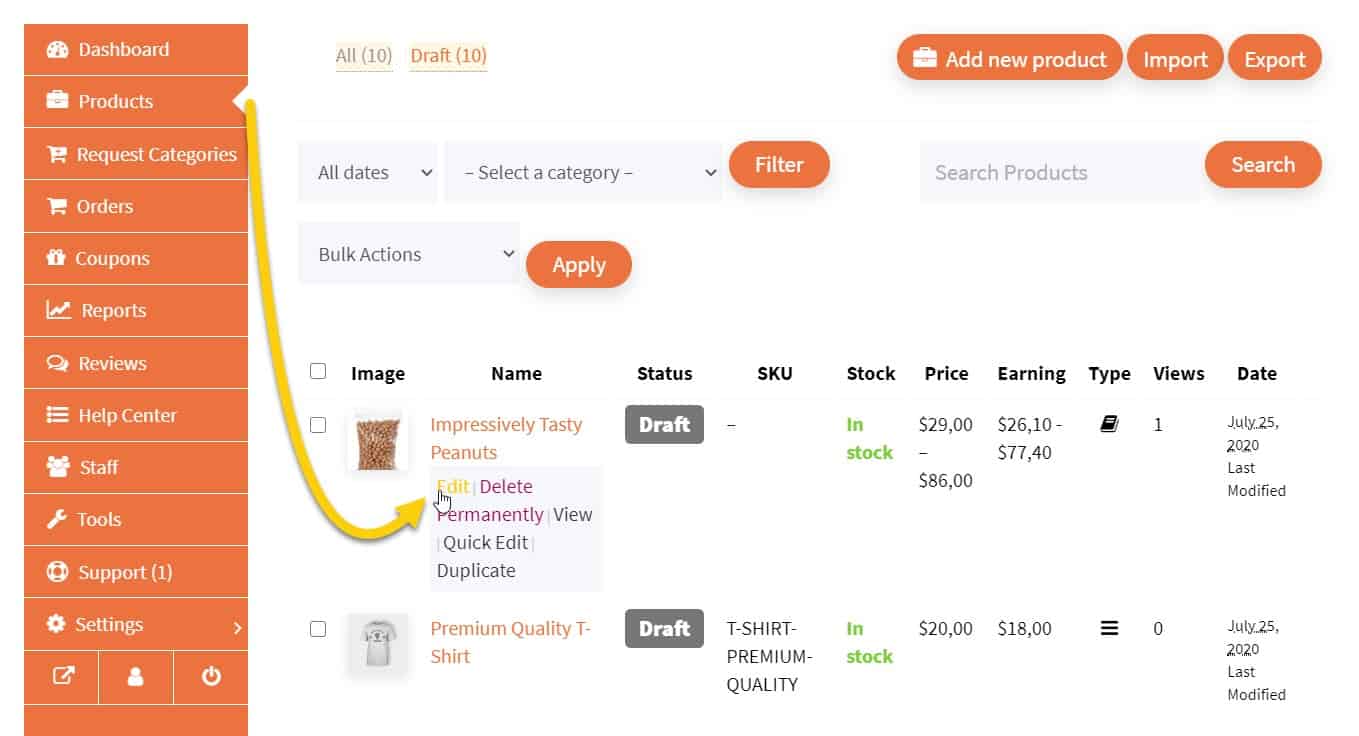
In this example, we’ll use the Impressively Tasty Peanuts sample product and create 3 variations based on weight:
- A 48 oz. option
- A 64 oz. option
- A 96 oz. option
You can add as many options as required.
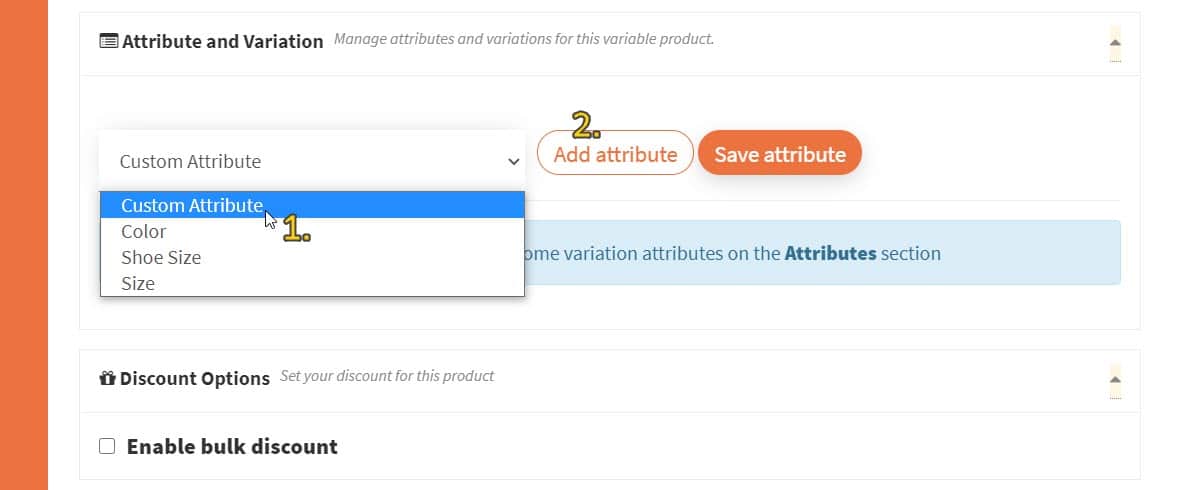
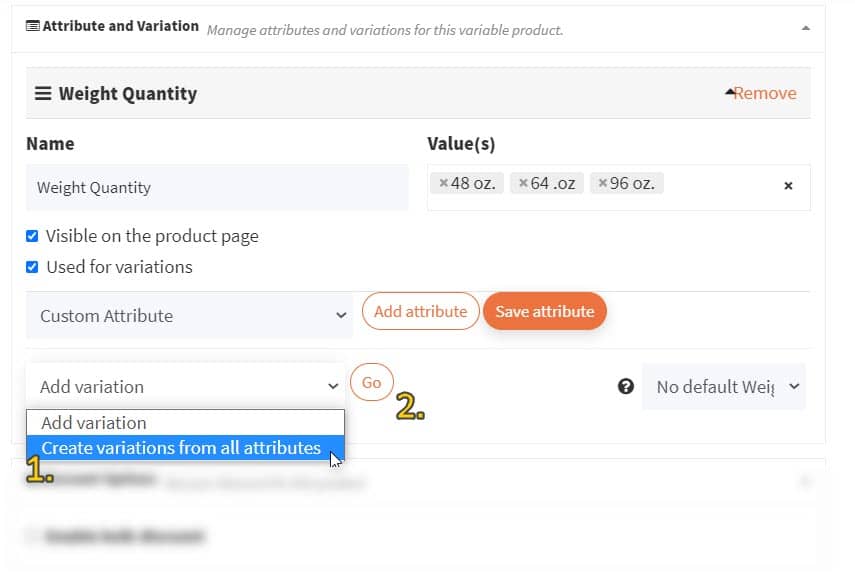
Step 2: On the product edit page, scroll down to the Attribute and Variation section then toggle the dropdown and select the attribute that fits your need.
If there isn’t one, then you can alternatively select Custom Attribute to create your own and click Add attribute:
Step 3: Give your custom attribute a name. For our peanuts, we’ll call it Weight Quantity. Then input your attribute values separated by pressing the Enter key on your keyboard after each value (i.e. 48 oz. → Enter → 64 oz. → Enter → 96 oz. → Enter).
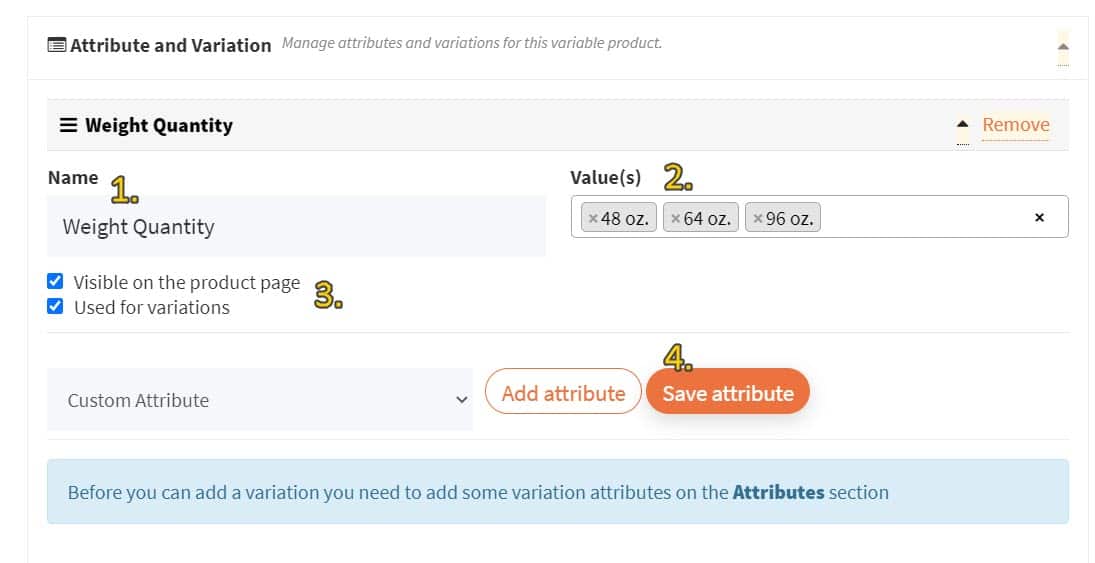
By default, Visible on the product page and Used for variations are both enabled.
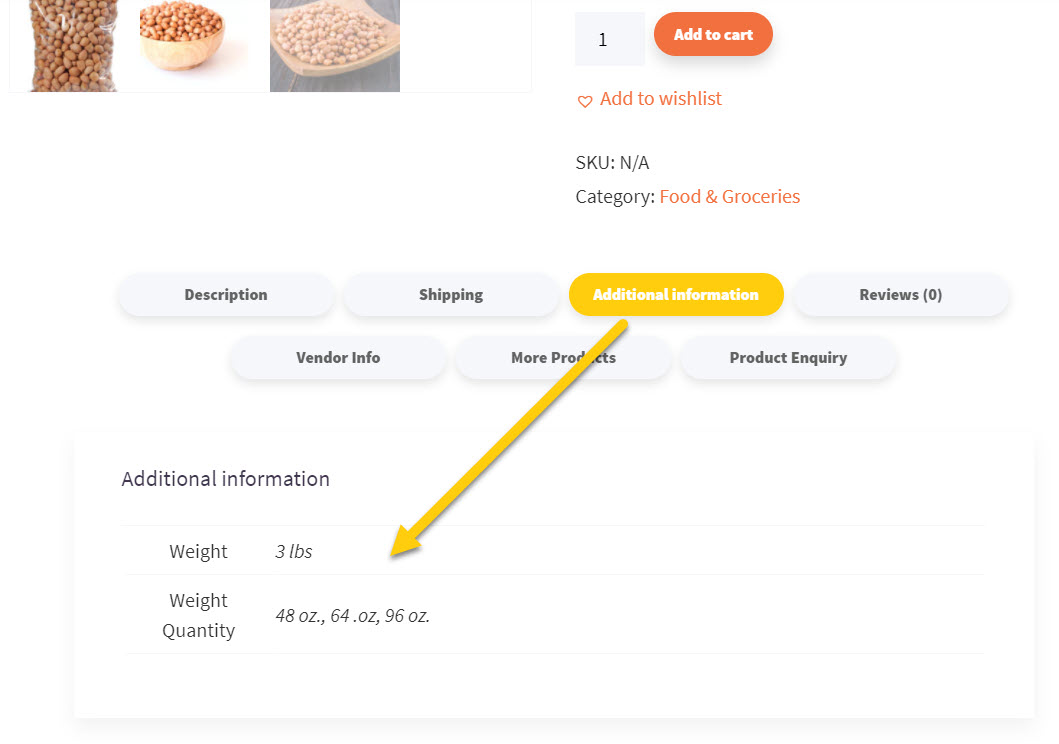
The first option lets you toggle an additional information tab on the front-facing product page, which customers can select to see the product variations (attributes):
The second option must be enabled for customers to be able to choose between the different product variations.
Finally, click Save attribute to save your settings.
Step 4: Next, you need to create the peanut product variation(s) from the attributes (i.e. 48 oz., 64 oz., 96 oz.) you input earlier. You can create them one at a time or all at once.
For this example, let’s select all at once and click Go:
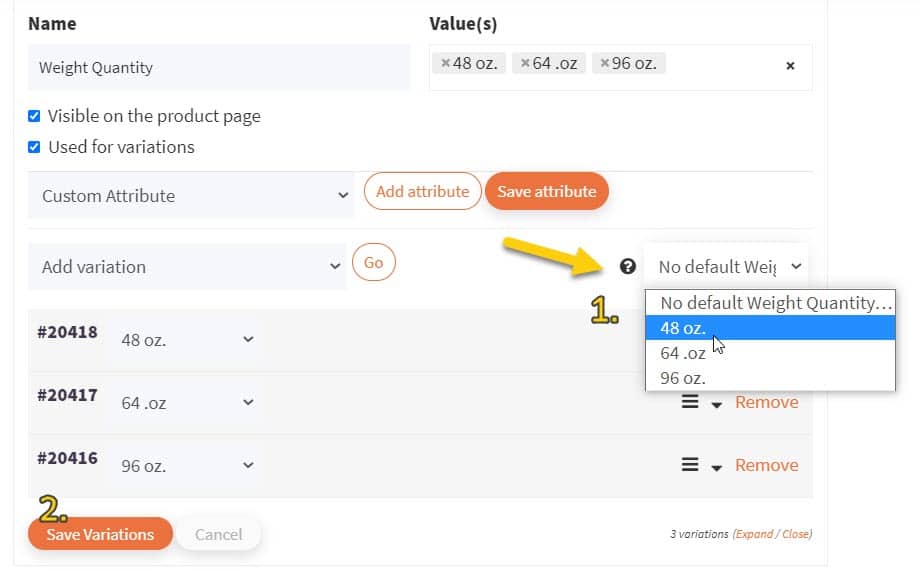
After that, go ahead and choose the default weight quantity option that customers will see when they open the product page, then click Save Variations:
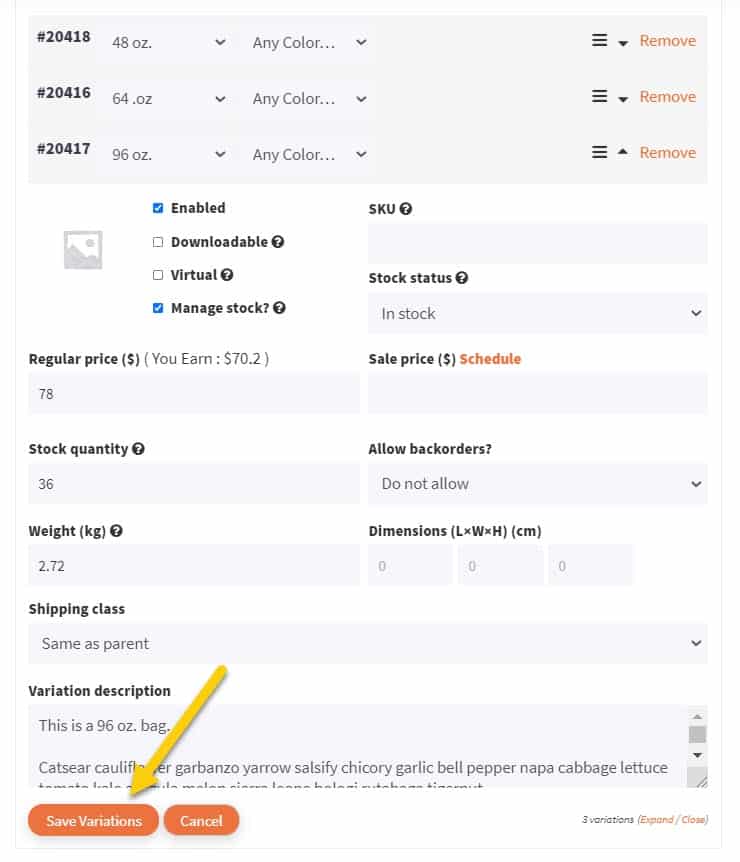
Step 5: For each product variation, toggle the corresponding options dropdown and apply any necessary configurations:
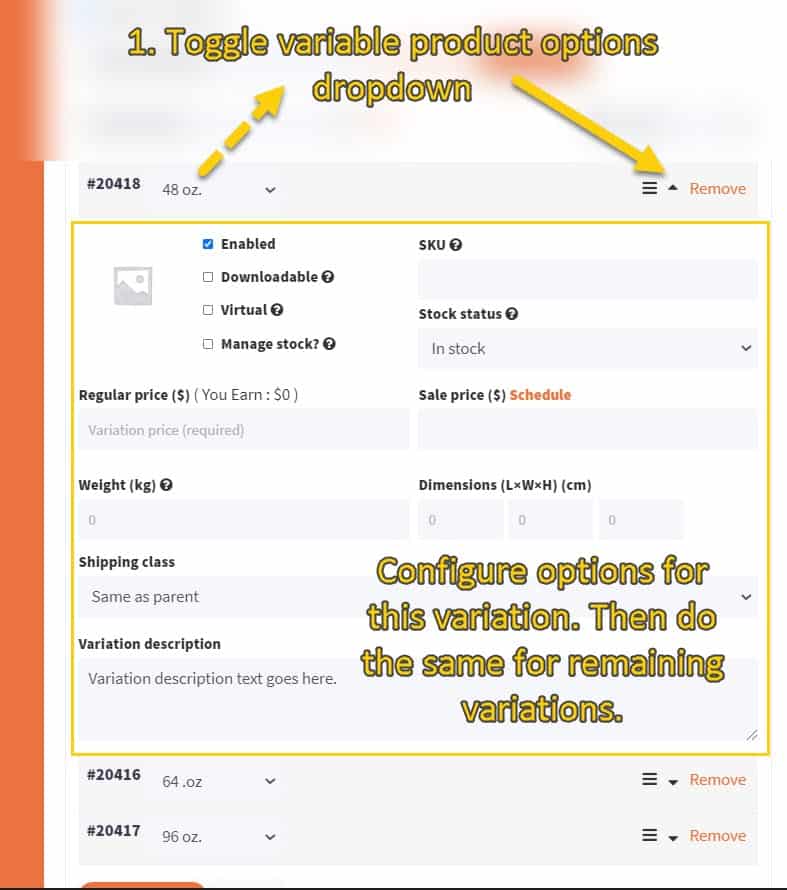
Also, for each variation, you should, if applicable:
- upload and set a featured image;
- set the
Regular price; - enable
Manage stockto setStock quantity; and - write a description which mentions any key differences or what sets the given variation apart from other variations.
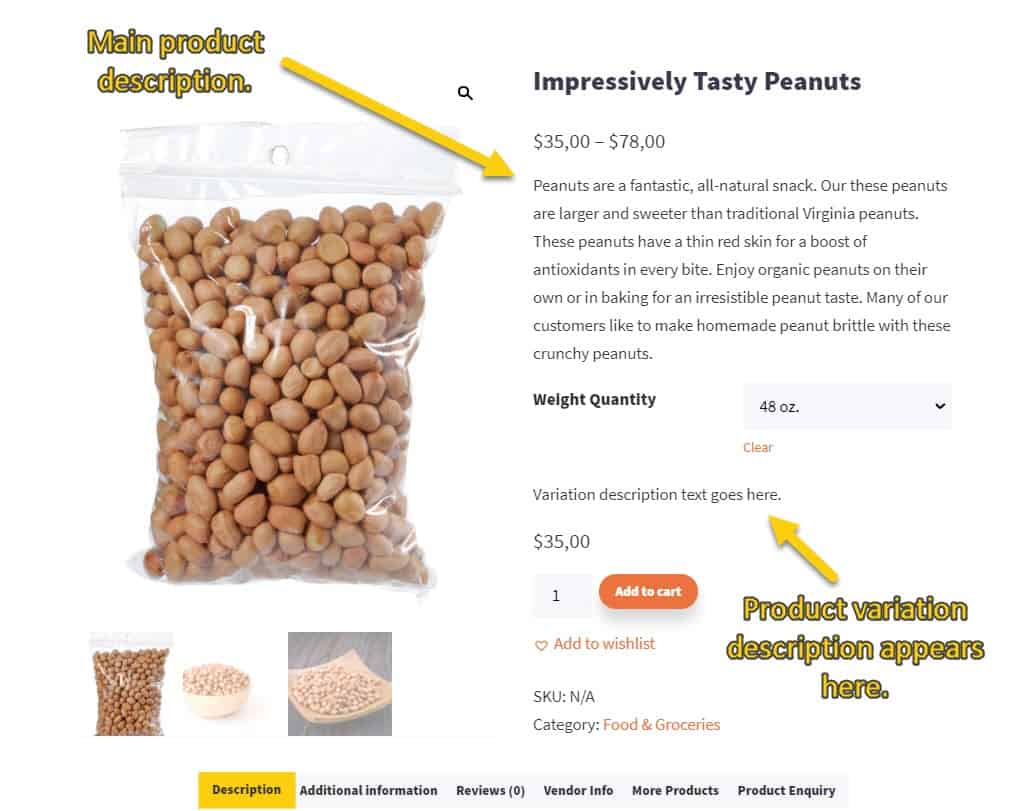
The product variation description will appear below the main description:
Once finished configuring the options for each product variation be sure to save the changes by clicking Save Variations:
That’s it! You’ve now created an attribute and attribute variations for your product.
Can You Add Multiple Attributes for the Same Product?
It’s definitely possible to set multiple attributes.
If we take the peanut product example, we could also add different peanut types such as Valencia peanuts, Spanish peanuts, runner peanuts, and Virginia peanuts, in addition to the weight quantity.
Then the customer will be able to select both the type and quantity they want.
For a more common example, however, clothing products are a great use case for multiple attributes where you’ll often need at least size and color.